In today’s post, I want to talk about how to use a bead spinner for French beading. But first, I think we need to answer two important questions.
- What is a bead spinner?
- Do you need to use one?

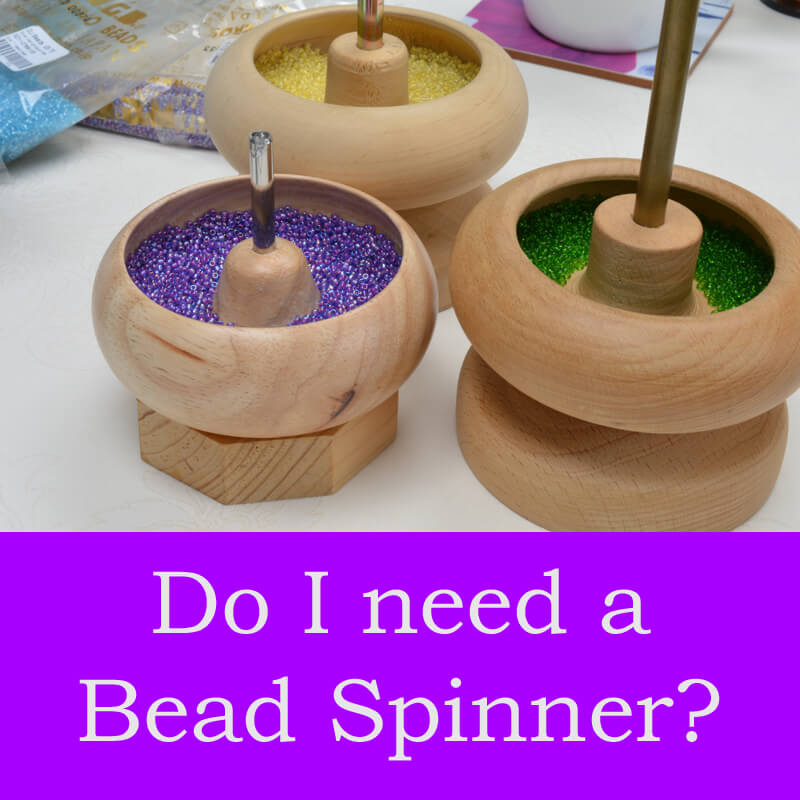
What is a bead spinner?
That photo above is a bead spinner! It is basically a bowl on a spindle. The spindle allows the bowl to spin. So, when you fill it with seed beads, you can spin it around.
Centrifugal force pushes the beads into a stream at the edges of the bowl. So, if you stick a piece of wire, or a long needle into these beads, then a steady stream of beads will flow up your wire/needle and thread.
You can use a bead spinner any time you want to thread a large quantity of seed beads.
In the rest of this post, I am going to focus on how to use a bead spinner for French beading. But remember, you can also use this clever gadget for a stringing project, or possibly for string beads prior to bead crochet. You may also know of other crafts where this gadget would be helpful.
 Buy the French beaded rose kit here>>
Do you need to use a bead spinner?
Let me tell you a little story. Then, you will be able to answer that question yourself.
Back when I started French beading, I didn’t have a bead spinner. For a while, I didn’t even know they existed.
Take a look at the photo of the rose, just above. This was one of my early designs. It contains around 3,000 size 11 seed beads. Now, I used to thread all my beads by hand. That meant, picking up each bead and threading it onto the wire. It used to take me about two hours just to thread the beads for this rose. Then, another two hours to make it.
So, when somebody told me about a gadget called a bead spinner, I thought it was worth investigating. Then I heard it cost £30 or more. So, for me, this was a significant investment. What I wanted to know was, would a bead spinner really work?
I talked to few people and finally decided to try it. So, did it work? Was it worth the investment?
Remember how I used to spend 2 hours threading the beads for a rose when I did it by hand? Now, with a bead spinner it takes me 10 minutes.
So, what do you think – do you need to use a bead spinner for French beading…?
If it takes two hours to thread beads for a rose by hand, how long do you think it would take for the African Violet, the strawberry, or even just that Calla Lily…?


Buy all these and other French beading patterns here>>
How to use a Bead Spinner
I’m guessing by now, you are at least tempted… So, let me talk about how to use a bead spinner. How does this magic gadget actually work?
Well, I’ve already explained the principle above. If you can get beads flowing, then you can stick a piece of wire into them and odds are, at least some of those beads will fly ONTO the wire, not just past it.
If you want to see this in action, then check out this video.
So, yes, using a bead spinner really is a simple as filling it with beads, spinning it round and sticking a piece of wire in the bowl to catch the beads.
However, if you’ve ever tried this – or watched some else try – for the first time, you may not think this is quite so simple…
Two common problems
Very likely, one (or both) of two things will happen when you start learning how to use a bead spinner.
- You will end up with a huge number of beads flying out of the spinner
- You see the depressing sight of only about 5 beads making it onto your wire, even though you’ve been spinning for five minutes. And you start to wonder if this wouldn’t be quicker by hand after all!
And yes, before you ask, both these things have happened to me. But with practise, I learned how to use a bead spinner properly. So, let me share the tricks that took time to learn.
The 3 tricks you need…
If you are struggling then, you need to check that you have all three of these elements in place…
Trick number one
Use enough beads in your bead spinner. You want to half-fill the bowl. So, when you start spinning, all the beads will fly out to the side, but create a stream that is wide and deep.
Look at the two photos below. The first shows my bead spinner with beads ready to go. Note, how they cover the base of the bowl and sit reasonably deep. So, then, when you start spinning, you can see them naturally gravitate to the sides. (That second photo isn’t just ‘out of focus’, it is actually an ‘action shot’ with the bead spinner spinning. So, look at the position of the beads).


Trick number two
Now you have your beads flowing nicely, you need to get your wire in the correct position. So, here the trick is to employ logic and use your eyes.
Here’s the logic part. This is basically a game of ‘odds’. If you have a large quantity of objects (beads) flying towards a small vessel (wire), then the odds are that the vessel will be in the path of some of those objects and they will end up inside the vessel. That is literally the ‘science’ behind the ‘magic’.
If you want another analogy, imagine someone holding a huge hose pipe gushing out water straight at you. You want to fill a little bottle. So, if you hold that bottle in the gushing water, some of the water will end up inside the bottle. The better you aim your bottle, the quicker it will fill with water. So, you would be trying to work out where it is best to position the bottle relative to the flow of water.
This is precisely what you are trying to do with the bead spinner. So, here is where you use your eyes. Look into the spinner and see where the largest quantity of beads are flowing. This should be towards the outer edge. It will also be sort of in the middle. Look at the red arrow in the second photo above. That is the area where you need to place the end of your wire. (Note: you can place it in this area at any point around the circle: side, front or back).
You also need to make sure that your wire is pointing AGAINST the direction of the flow. So, if your beads are flowing clockwise, your wire needs to be pointing in anti-clockwise. Or vice versa – you can spin a bead spinner in either direction.

Trick number three
Shaping the end of your wire. Now, this is going to be different for everyone. So, you will need to experiment here.
For me, the perfect shape is to create a little hook, like I’ve done in the photo above. This hook doesn’t want to be too big or too small. I can then aim the end of the hook into my flow of beads. Then, when I’ve strung enough beads, as I stop spinning and slide them up the wire, the hook just prevents them from falling off.
Now, for other people, the bead spinner works better when they keep their wire straight.
So, you are going to need to experiment and find what works best for you. The answer will depend on where you naturally want to place your wire in the spinner. Just try what feels natural at first, observe, and adapt until you find something that works for you.
The definitive rule for learning how to use a bead spinner
So, let’s imagine, you think you’re following all three of my tricks. But still your spinner isn’t really getting a lot of beads onto your wire. What do you do?
Well, there is really only one definitive rule for learning how to use a bead spinner… Practise, practise, practise!
Yes, that’s right. You just need to be patient with yourself and keep persevering. Also, remember, even after fifteen years of using a bead spinner, I still get days when it doesn’t work brilliantly. I think sometimes a particular type of bead, or type of wire, or combination of the two, just isn’t great for spinning.
But don’t give up! You will reap the rewards.
Which bead spinner is best?
Again, this is going to be a personal choice. But I recommend going for a wooden bead spinner. I also recommend a larger size.
Personally, I have found the little plastic spinners don’t spin very smoothly. So, this is really unhelpful when you are trying to get a flow of beads going.
I also find that a bigger spinner just gives you more area to work with when you’re trying to get your wire into the bead flow. So, yes, it will need more beads in it to work well. But this is worth it for ease of use, in my opinion.
You may also have seen the battery operated spinners (The Darice Bead Spinner). So, do they work? I don’t have one myself, but I did get the chance to try one. Yes, it works, but whether or not it is beneficial is up to you. The battery power is what turns the bowl. So, you only have to focus on sticking your wire into it. However, you have no control over the speed at which it turns. Is this good or bad? Neither: it’s just a matter of preference.
Hopefully that has helped if you are learning how to use a bead spinner. I’m going to be back to talk about my top tips and troubleshooting for French beading in the next couple of blogs.
And remember, you can follow the whole series, starting here>>


I’ve done a lot of French flower beading in the past and cannot live without my bead spinner. I was visiting and away from home and had forgotten to bring my spinner with me. I immediately went to an AC Moore craft store and bought another one. Then for Christmas I was gifted with a battery powered one. I love it! It has 3 bowls which allow for quick change outs when needed. It does spin a little slower than I usually do with my wooden ones, but I’ve found I get a better fill rate that way. Here in the US, all the big craft stores carry the wooden spinners and they are not that expensive. I totally agree with Katie’s recommendation to purchase one.