Are you wondering how to make beaded boxes? Perhaps you have seen a design you would like to try and you’re wondering whether you will be able to manage it. Or maybe you have aspirations to design your own.
Well, let me talk you through the process.
What are beaded boxes?
If you’re going to be learning how to make beaded boxes, then you need to know what you’re trying to make. That may sound like a stupid thing to say. But there are lots of different ways of making beaded boxes.
So, let’s start with my definition. A beaded box is a beaded vessel of any shape or size. It should be self-supporting (ie not beaded around a form). And, it has a means of opening, so you can store something inside it.
Based on that definition, there are loads of different ways you can make a beaded box. So, let’s talk through some of them.
What techniques do I need?
In theory, you can use any technique that will give you a strong construction. In practise, this really limits you to three techniques.
- Cubic Right Angle Weave
- Peyote stitch
- French beading
In my opinion, all other bead-weaving techniques create a much looser fabric. So, this won’t have the ability to support itself.
You are probably surprised at the third technique. We usually associate French beading with making flowers. However, because it is a wirework technique, it will create a self-supporting structure. So, you can take this technique and use it to make a beaded box. I’m going to leave that idea with you and maybe consider it for another blog post. For now, I want to focus on CRAW and Peyote.
(By the way, I’m assuming you already know what these techniques are. If you don’t, you can find out here>>)


These may not be boxes, but you can see how French beading techniques can be used to create dimensional, self-supporting shapes. Find the patterns here>>
How to make beaded boxes with CRAW
If you have ever done any CRAW, then you will know that each individual unit is like a little cube. So, if you’re thinking about beaded boxes, think about building blocks.
Basically, you can link these cubes into flat planes. Then, build walls. The structure will be solid, but it also has a lovely ‘squidgy’ feel.
Strengths
Once you have mastered the CRAW technique, it’s not that difficult to conceptualise a box. Like I said, think about building blocks.
The structure of CRAW also opens it up to embellishment. So, once you have built your basic box structure, you can add all sorts of details.
Weaknesses
A lot of people find it difficult to master CRAW. When you are building a box, you really need to be able to think in 3-D. So, it can be quite confusing to work out where each block needs to join.
Adding in a pattern can be a bit of a nightmare. Certainly, it is a nightmare to diagram when it comes to writing up a pattern! You will find yourself using quite complex combinations of bead colours in each unit to create a pattern on the box.
The cube shape means the type of boxes you can create will be limited. Obviously, squares and rectangles are in there. But more rounded shapes are going to be tricky. So are diagonals, which means, forget roofs for houses or something like that! You can create layers and levels, though.
Project to try
If you are curious and want to learn more about how to make beaded boxes with CRAW, this tooth fairy design is a good place to start. You’ll get to build a basic box, add compartments, lids and embellishment. So, you’ll find out a lot about how the structure works.


Get the tooth fairy CRAW beaded box pattern here>>
How to make beaded boxes with Peyote stitch
Probably, most of the beaded boxes you’ve seen will use Peyote stitch. This is such a flexible technique. It fulfils the criteria of being firm enough to create a self-supporting vessel. Then you can use basic increases and decreases to shape it into pretty much any design you care to imagine. And, like CRAW, you can embellish it too.
So, yes, my imagination has extended to some pretty unexpected places…


Find all these beaded box patterns here>>
So, the bit you’ve been waiting for…
How to make beaded boxes in Peyote, step by step…
Before you start, make sure you are comfortable working in Peyote stitch. You need to have mastered the following techniques:
- Circular Peyote
- Tubular Peyote
- Increasing (within rows)
- Decreasing (within rows)
- Stitch in the Ditch (that’s adding a new row on top of an existing row in the middle of your work)
That’s it! If you have those skills, then you’re ready to make a beaded box. If you don’t have those skills, check out my free tutorials and grab what you need to learn.
Step 1
Decide what shape you need for the base of your box. So, this could be a triangle (the easiest shape), or a circle (really, this is a hexagon), or a square, or rectangle or pentagon.
For each of these shapes, there is a given Peyote increase pattern that will use circular Peyote to create the flat base.
You can also get more complicated and create other shapes by combining these basic shapes. Think back to school geometry… But we’ll leave that lesson for another day! (Unless you’re really interested, in which case, I can offer you some options below)


Step 2
You now have a flat base with a Peyote edge around every side. So, building the walls is simple. Just start working in tubular Peyote (ie stop adding increases!). The sides of your shape will naturally build up into a tube. So, you have a box!
Step 3
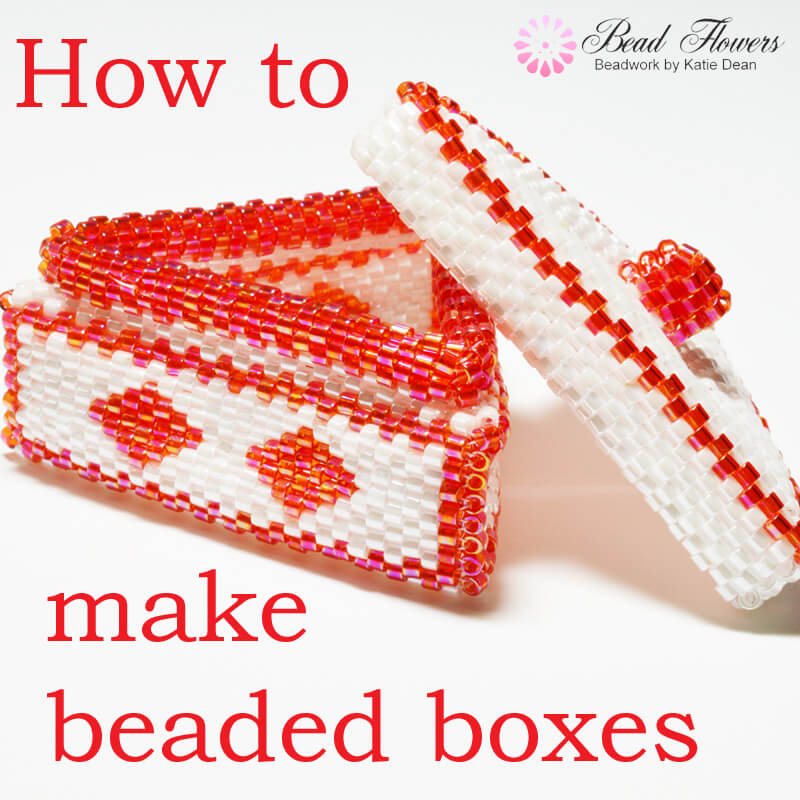
In order to neaten the edge and also give it strength, you need to create a lip. (If you don’t know what I mean by that, pop back up to the main image and take a look at the red section at the top of the box. This is the lip.)
This lip will also be the means of holding your lid in place. So, this is a critical design element.
Will the lid sit inside the box, or around the outside? Will it be sized so it is flush with the box, or will it overhand or indent? Or, maybe it has a hinge?
The decision you make about that dictates the design of your lip. The technique for the lip will involve some decreasing and some stitch in the ditch. So, that’s where those skills come into play.
Step 4
Finally, you need a lid. This is basically made in the same way as the box base. So, you start with a flat shape, then build walls and add a lip.
However, the size of your lid needs to be calculated very carefully so that it will fit your box.
Step 5
Add any decoration that you need to. Although, bear in mind, you might need to incorporate the decoration into either (or both) the box and lid as you work. So, this element is something you need to plan from the very beginning.
Decoration can be as simple as a pattern on the sides of the box – this would be incorporated into your tubular Peyote walls. Or, it might be something dimensional to give the box character or shape. Again, this could be incorporated into the walls or lid. Or it might be added at the end.
Here are a few examples to show you what I mean…


Make your own beaded box
So, if you have aspirations to design beaded boxes, you now know how it works.
If you’d rather someone did all the calculations and worked out the geometric intricacies for you, then you should look for a beaded box pattern. So, let me help you out there.
If you have already tried making beaded boxes, then you can simply browse my range of patterns for a new design that you love.
However, if you’ve searched out this post, chances are, you’re new to beaded boxes. So, I hope I’ve shown you that, when you break them down into individual steps, the concept of how to make beaded boxes isn’t as scary as you might think.
Let me guide you to the perfect place to start. This beginner’s beaded box uses the simplest shape and has colouring that will guide you easily through the construction process. So, it’s a great project for building your confidence and getting started.