If you are one of my newsletter subscribers, then you will have seen me promise this post. I want to show you how you can use my beaded pen patterns to make bracelets!
First, let me just tell you why this occurred to me…
Reason number one:
I’ve realised that there is such a thing as too many pens! However, that hasn’t stopped my addiction for beading them. So, I had a second thought…
Reason number two:
My addiction isn’t to do with beaded pens as such. No – it’s the process of creating and stitching a Peyote pattern that I love. So, I started to think laterally. How can I still enjoy this, but not necessarily make pens? …I’ll come back to that…
Reason number three:
My beaded pen patterns are designed to fit a specific pen base. Each pattern links to the shop where you can buy this. However, I thought of two potential problems. Firstly, if you live outside the UK, maybe you want to buy supplies from your own country. Secondly, maybe you feel the cost of the pen base is too much. So, if you have experienced either of these problems, this blog post is just for you.
If you haven’t experienced these problems, then I hope you will simply enjoy exploring a new beading idea! I’m going to show you three ways to make bracelets from your beaded pen charts.
The big idea…Make Bracelets!
It’s simple really. What else can you do with a strip of beadwork that is a Peyote pattern? Make bracelets!
Thus far, no problem. However, when you get your beaded pen chart, you will see that I have designed it for the full width of a pen. This is about 5cm (2.5″). So, that makes a fairly wide cuff. Happily, cuff bracelets are right on trend at the moment.
You will also notice that, since the pen pattern is designed to join together, it also means you can just keep on repeating it. So, simply start with row 1, bead all the way to the final row, then come back and start again from row 1. Keep doing this and just stop when you have a length to fit your wrist.
One tiny thing… You may also have noticed that some of the patterns start the objects ‘partway through’ in row one. That object is then completed at the end so you get a seamless join around the pen. So, I’m going to talk about two ways of finishing the ends.
I’m also going to show you how to choose and add a clasp. Naturally, this is essential for turning your pen into a bracelet!

My first attempt: Strawberries
I know I mentioned my weird obsession with strawberries when I launched the strawberry pen design. Well, when I decided to make bracelets from my pen patterns, I decided to start with the strawberry.
This proved very simple. I think it took about five repeats to create a bracelet to fit my wrist (happily, I have very small wrists!). Next, I pondered the ends. I had a couple of half-finished strawberries on each end of the bracelet.
So, I simply added a few extra rows. Just enough to complete each strawberry. You can kind of follow the pattern for this, but just remember not to start any new strawberries in this section!
The Clasp
Next, I had to decide on a clasp. Now, I’ve talked elsewhere about how to choose clasps when you are making jewellery. I usually prefer to use a magnetic clasp or a toggle clasp for bracelets. However, when you are making cuff bracelets, Slide clasps are also a great option.
In the case of my strawberry cuff bracelet, I decided to use a toggle clasp. The width of the cuff meant that I would need more than one toggle to secure it. So, I decided against using a shop-bought clasp. Instead, I used the same materials I had been using for the bracelet and beaded a toggle clasp.
This wasn’t just any old toggle clasp. I felt I needed to complement the bracelet design. So, I used my strawberry charm pattern to make two strawberries. I stitched these onto one end of the bracelet. Then I added a simple loop of beads on the other end. First, check the loop fits around the strawberry. Then, I added a Peyote row to my loop. This gave it a bit of interest and also made it stronger.
Voila! A beautiful summer bracelet pattern. It combines two existing designs and comes in at a very reasonable price! If you want to make your own version, just follow the links to get these two patterns.
More Ideas
This design will work with any of my beaded pen patterns. It’s the simplest place to start. So, if you like the idea, just browse through the selection of designs and you can make bracelets for as little as £2!

My Second Attempt: Narrower Cuffs
What happens if you want to make bracelets that are a little narrower than 5cm? It’s simple: just bead part of the pen pattern.
So, that’s just what I did with my Art Deco design. This is a symmetrical pattern and it lends itself very nicely to being ‘part-beaded’. All you need to do is decide how wide you want your cuff. Then look at the pattern and work out which section to bead.
I’m talking about the horizontal width here. So, for the Art Deco bracelet, I was able to bead the first three sections of my pattern. Simply put a piece of paper over the sections that you don’t want to bead. That way you won’t get confused as you work. Once again, you can keep following the pattern for as many repeats as you need.
The Clasp
For this design, I decided to use a Slide Clasp. You will want to make the bracelet to check the width. Then buy the appropriate size of Slide Clasp.
If you keep on reading, I will show you how I attached my Slide Clasp. Before that, I want to share my third idea for making bracelets from the pen patterns.

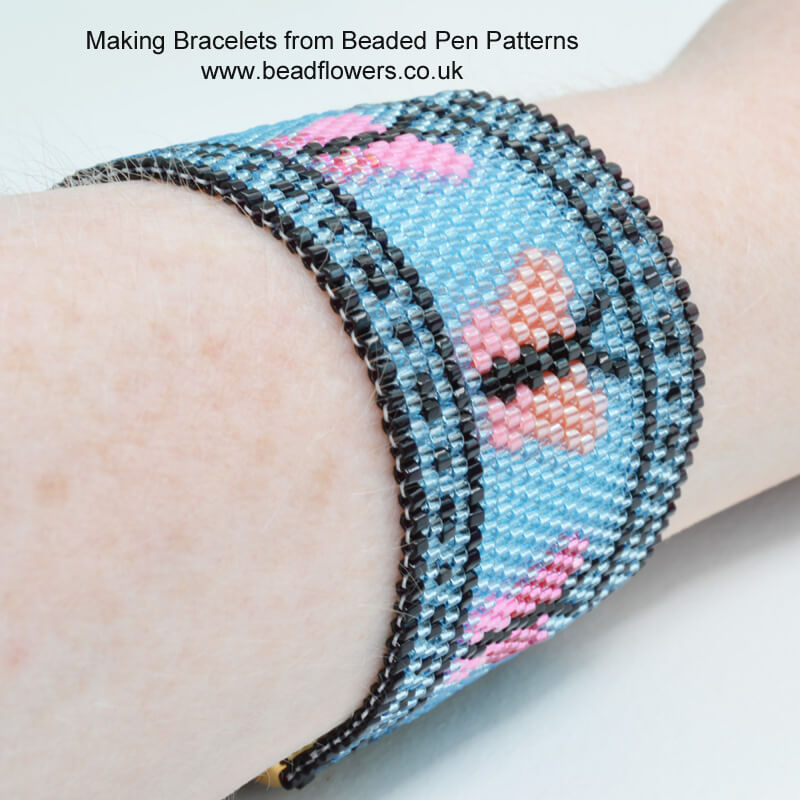
My Third Attempt: The Motif
If you have looked at my beaded pen patterns, then you will notice that a lot of them are made from small motifs. These work brilliantly when repeated around the pen. As you have just seen, they also translate well into bracelets. However, if you want a narrower bracelet, you may find it difficult to just cover part of the pattern. So, what is the solution?
Quite simply, take a single motif and repeat it all the way along the bracelet. Unless you are very good at following Peyote patterns, you might want to take a bit of time to prepare for this.
Step 1
Choose your pen design. I decided to use the butterflies for my third bracelet.
Step 2
Get some Peyote graph paper (you can find a free download in my free tutorials section). Then transfer a single motif from the pen design onto your graph paper.
Step 3
Count the height or width of the motif to work out how may beads are in a row. You can also add a border edge to the design if you wish. So, mark this on the paper as well. This gives you your repeat pattern.
Step 4
Enjoy beading the motif as many times as you need to fit your wrist
Step 5
Getting the perfect fit is simple. You can either fit the motifs to your wrist. Or, if you find your last motif would make the bracelet too long, just do as I did… Add some plain rows in a contrast colour to each end of your bracelet so you create the perfect fit. This also frames the ends.
Adding the Clasp
Once again, I added a Slide clasp for this bracelet. So, I promised to show you how to attach it…
You can attach slide clasps in two ways. If you wish, you can pick up a few beads, pass through the attachment hole on the clasp, then add a few beads and pass back into the edge of the bracelet. The beads hide your thread. However, they also add length to the bracelet. So, this may or may not help.
I chose to keep my Slide Clasp as invisible as possible. So, decide which is going to be the back of your bracelet. Place the first half of your clasp so that the holes are overlapping on this side. Then, simply overstitch through the holes. You will need to attach to the third row in from the end of the bracelet. That way, the holes will be hidden on the back and the clasp fits in the design. You will also notice that the thread shows, but since it is on the back of the bracelet, it will sit tight against your wrist and not be visible.
Make Bracelets to Suit You
Now you’ve got the three basic ideas, it’s time for you to make bracelets of your own.
First, pick your beaded pen design.
Next, decide which of these ideas will best suit that pattern.
Then make your bracelet.
Finally, add a clasp! If you want some more great ideas for beaded clasps, then you can also check out my book, ‘Beaded Clasps‘.
Now, you’re all set for summer…show off your gorgeous cuff bracelets and match as many outfits as you can!
I’d also love it if you show the bracelets you make or share some more ideas in the comments…